Let’s get started with your first sale and learn how to view past receipts!
2. Edit product details
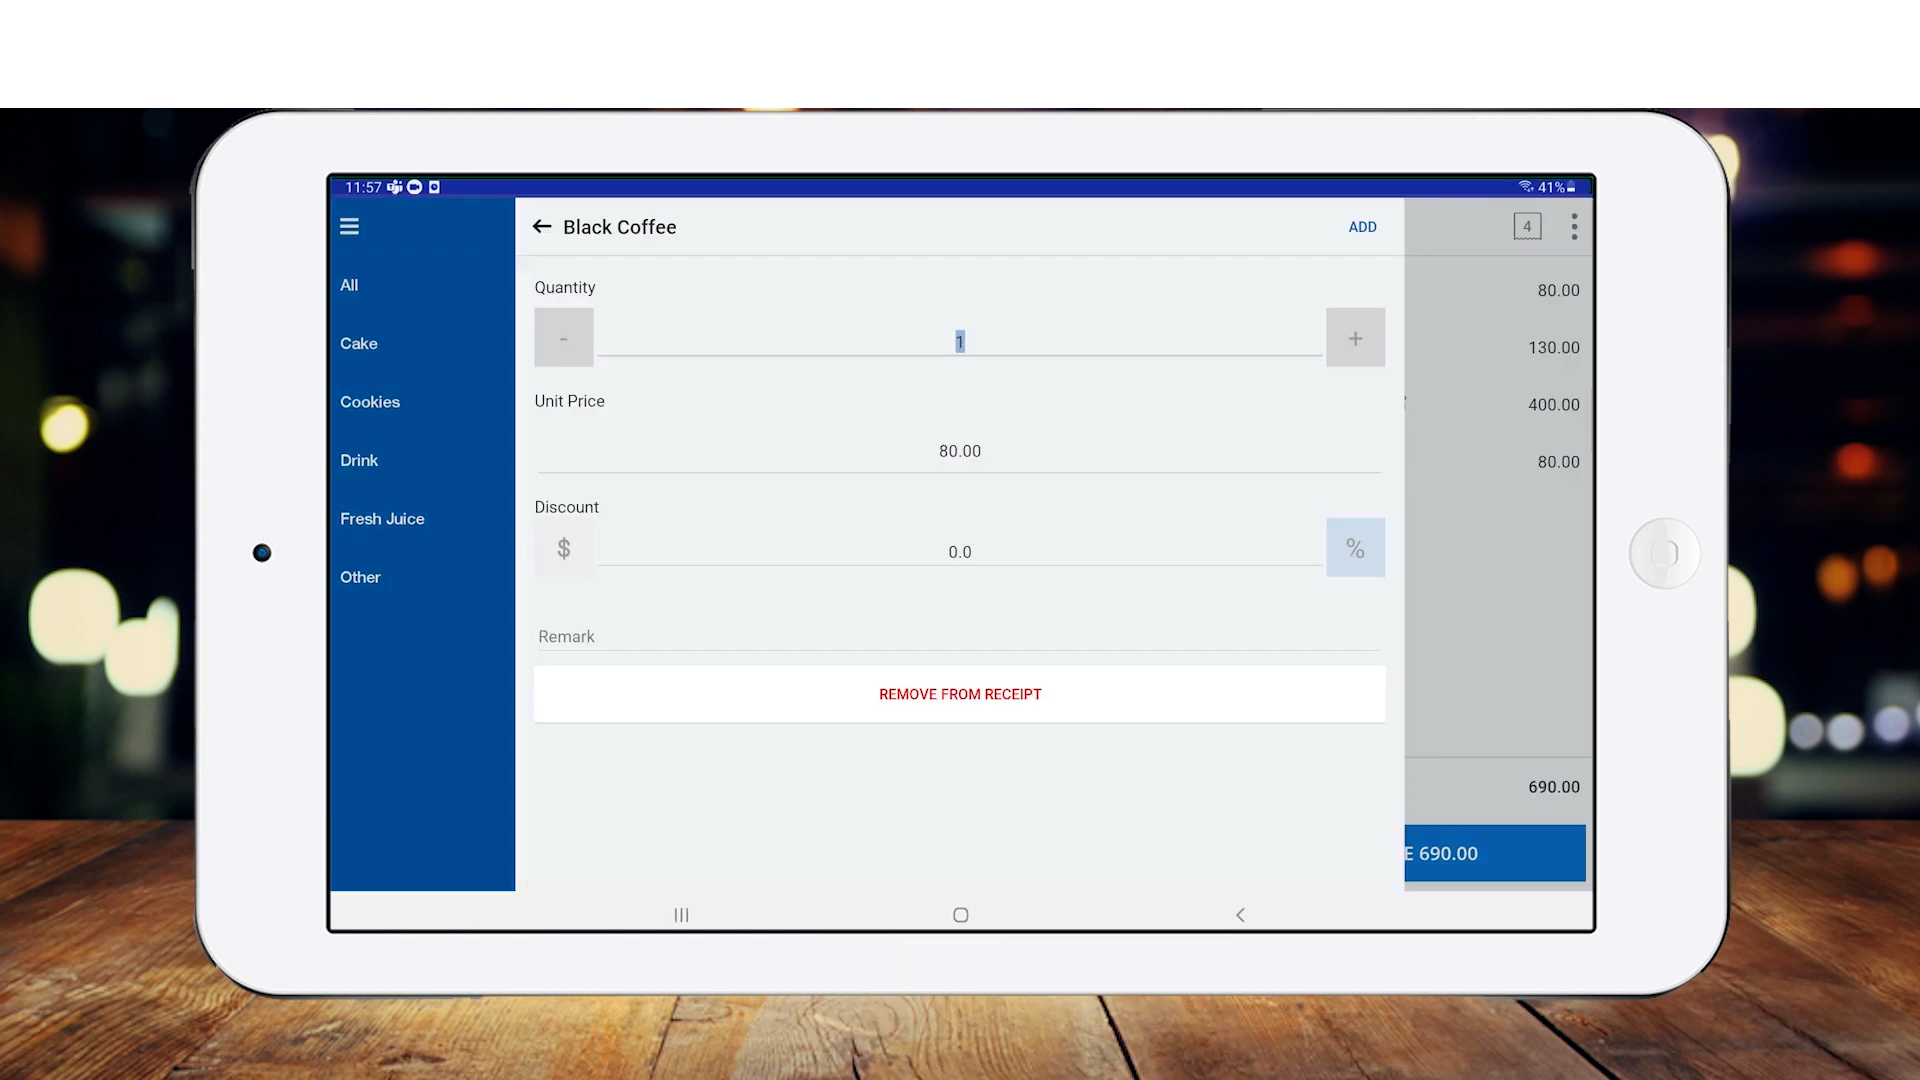
You can now:
- Adjust the product quantity
- Apply a discount
- Remove items from the cart
Let us know if you have any questions!
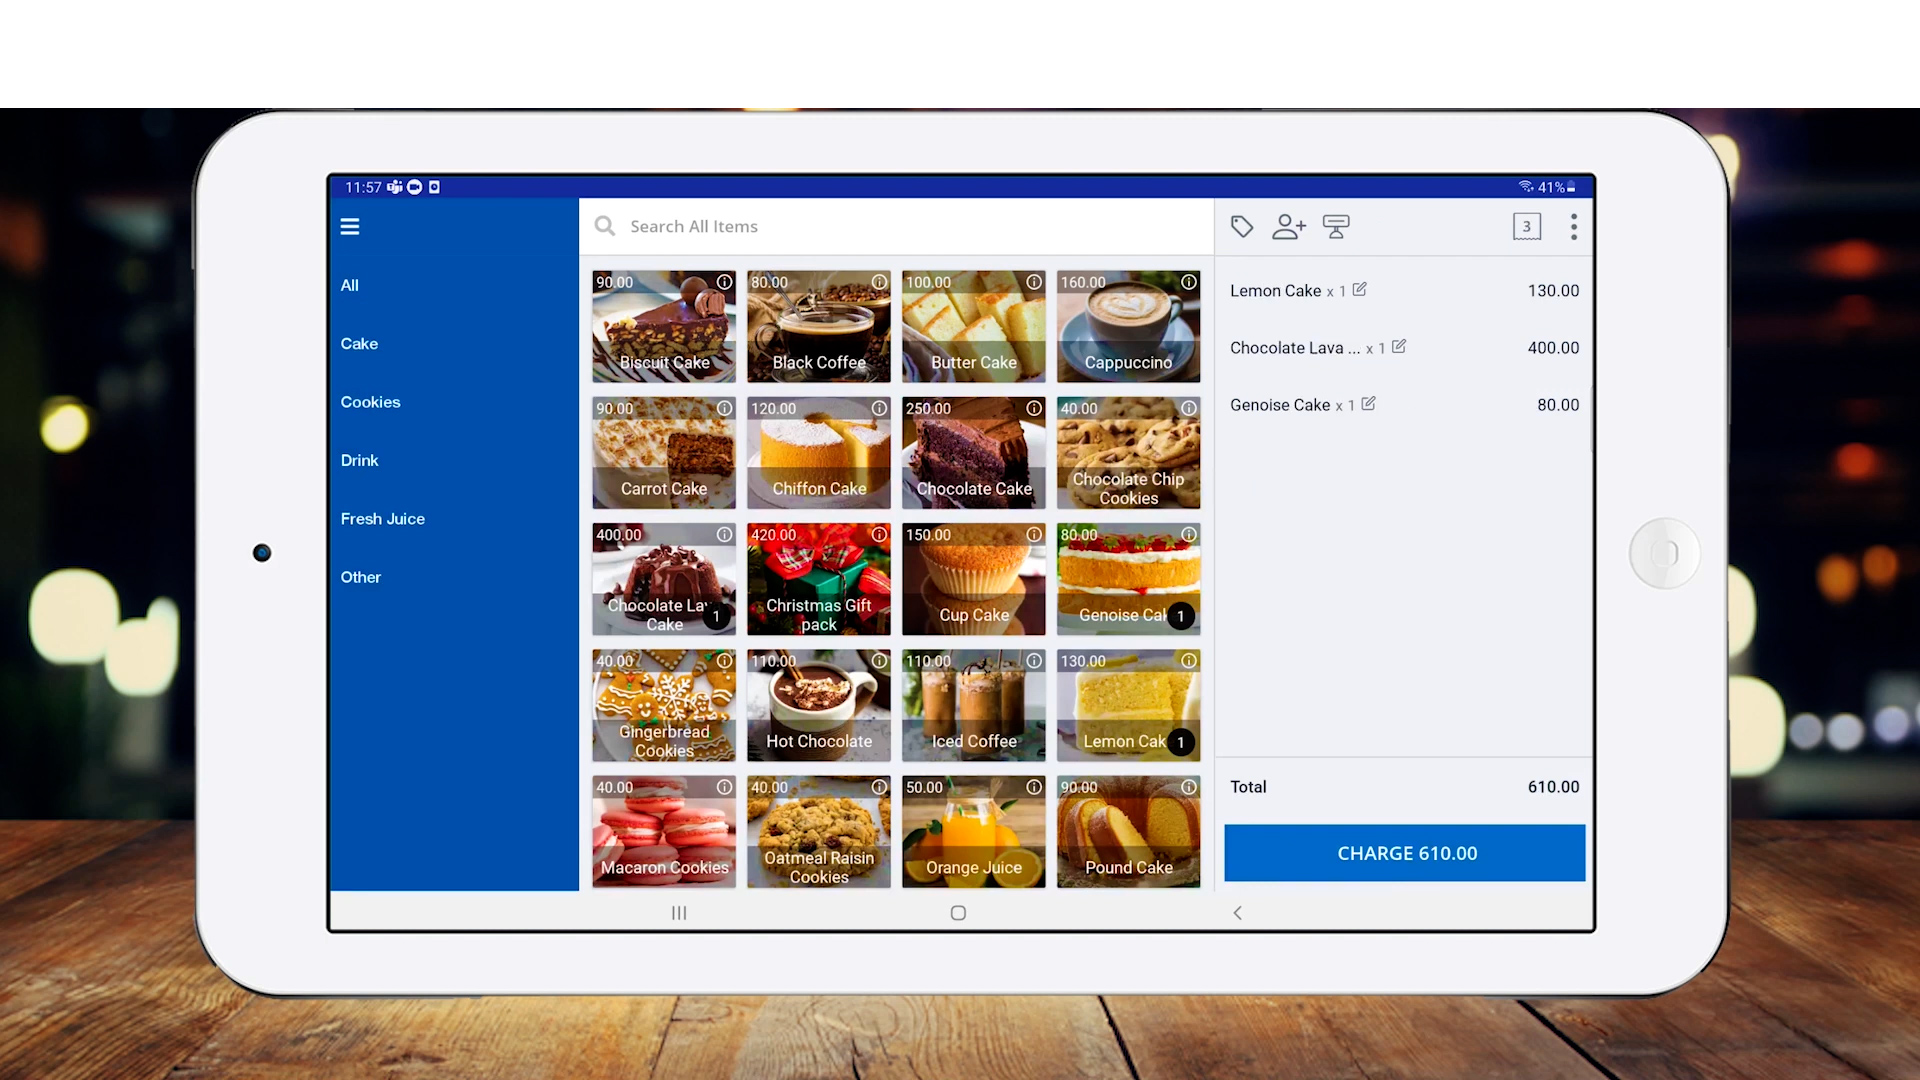
3.Once products are added to the cart, click the 'CHARGE' button to proceed with payment.
4. Process payments
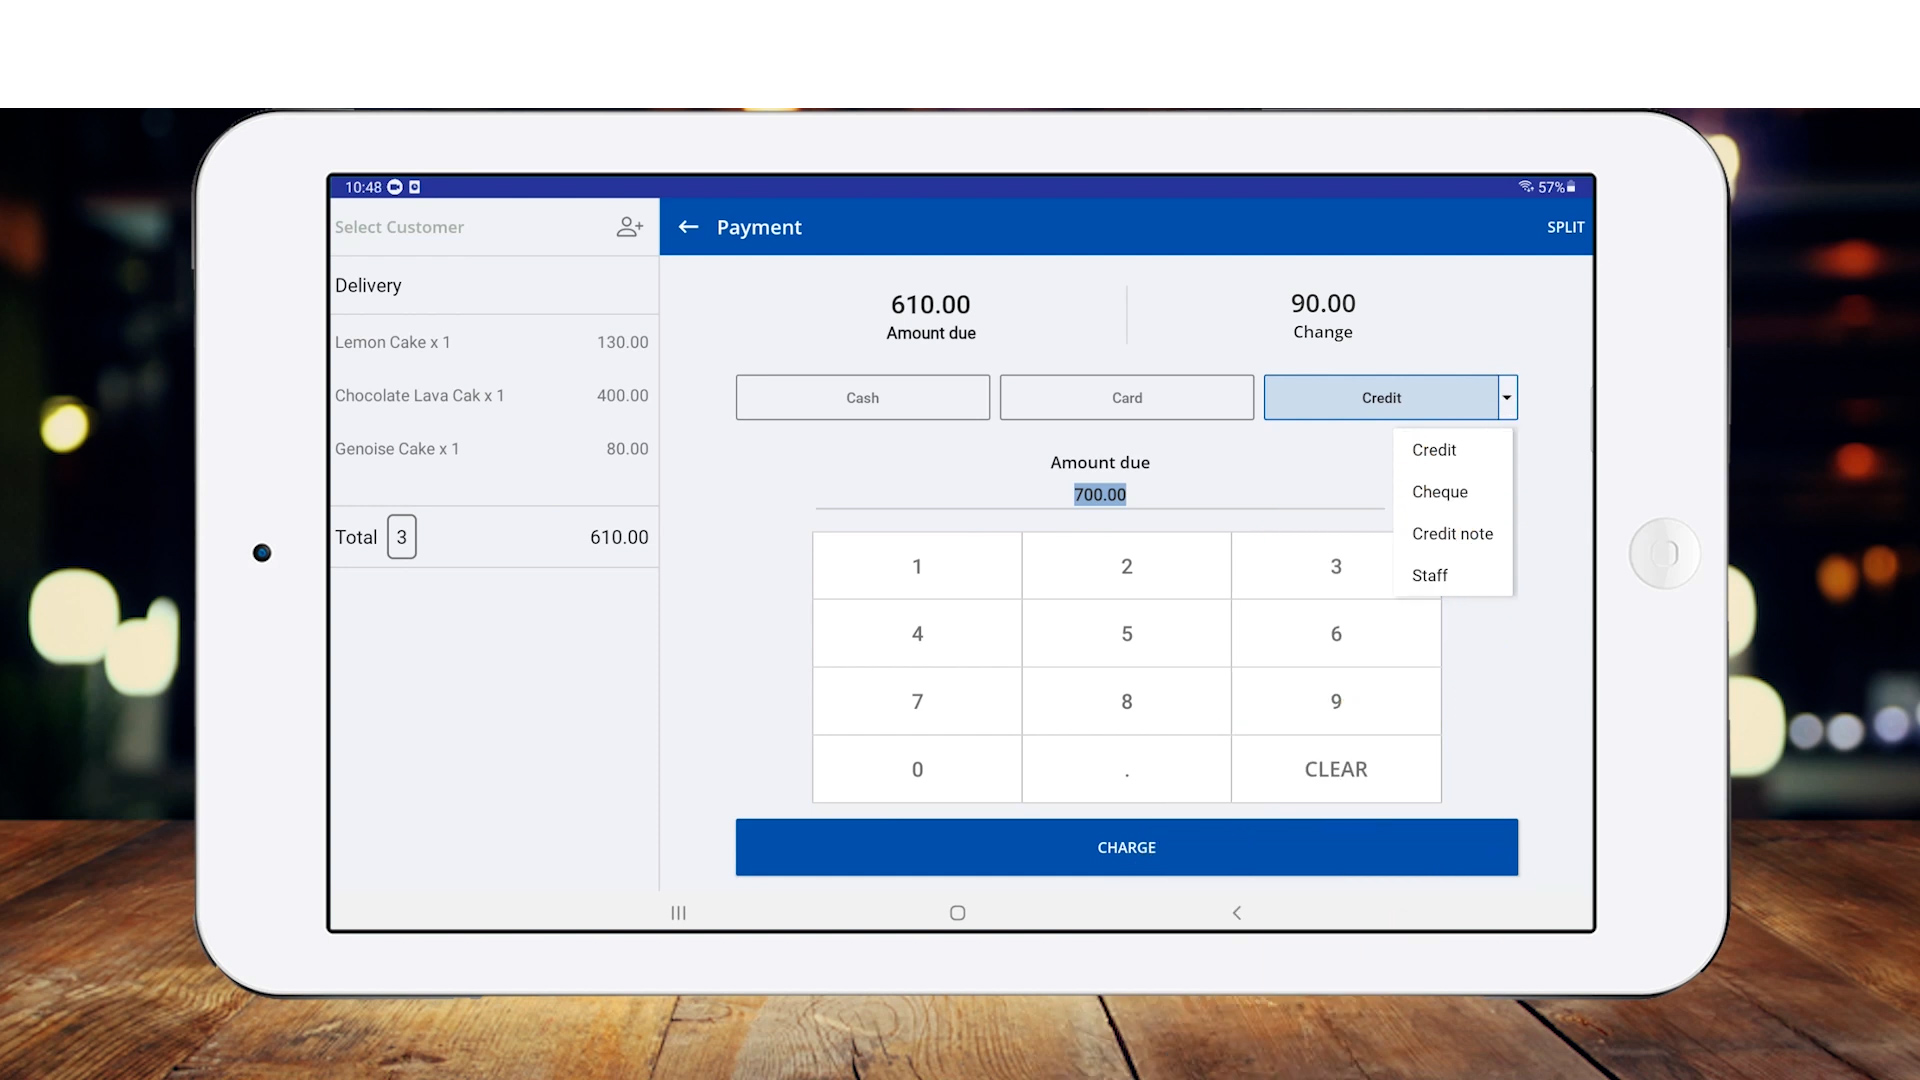
In the final stage of a sale transaction, you can choose from three main types of payment options:
- Cash: When accepting cash, manually enter the amount received in the 'Amount Due' field. The system will then display the total amount and any change owed to the customer on the screen, as shown in this image.
- Card: For card transactions, you can use a separate card processing system with Easy POS. To accept card payments, enter the amount due on the credit card terminal and process the payment. To record the transaction in Easy POS, select the 'Card' option and click 'CHARGE'.
- Other Payment Types: You can also accept payments through credit, cheque, credit note, loyalty points, and more. For additional details, refer to: How to Create & Use Different Type of Payment Methods
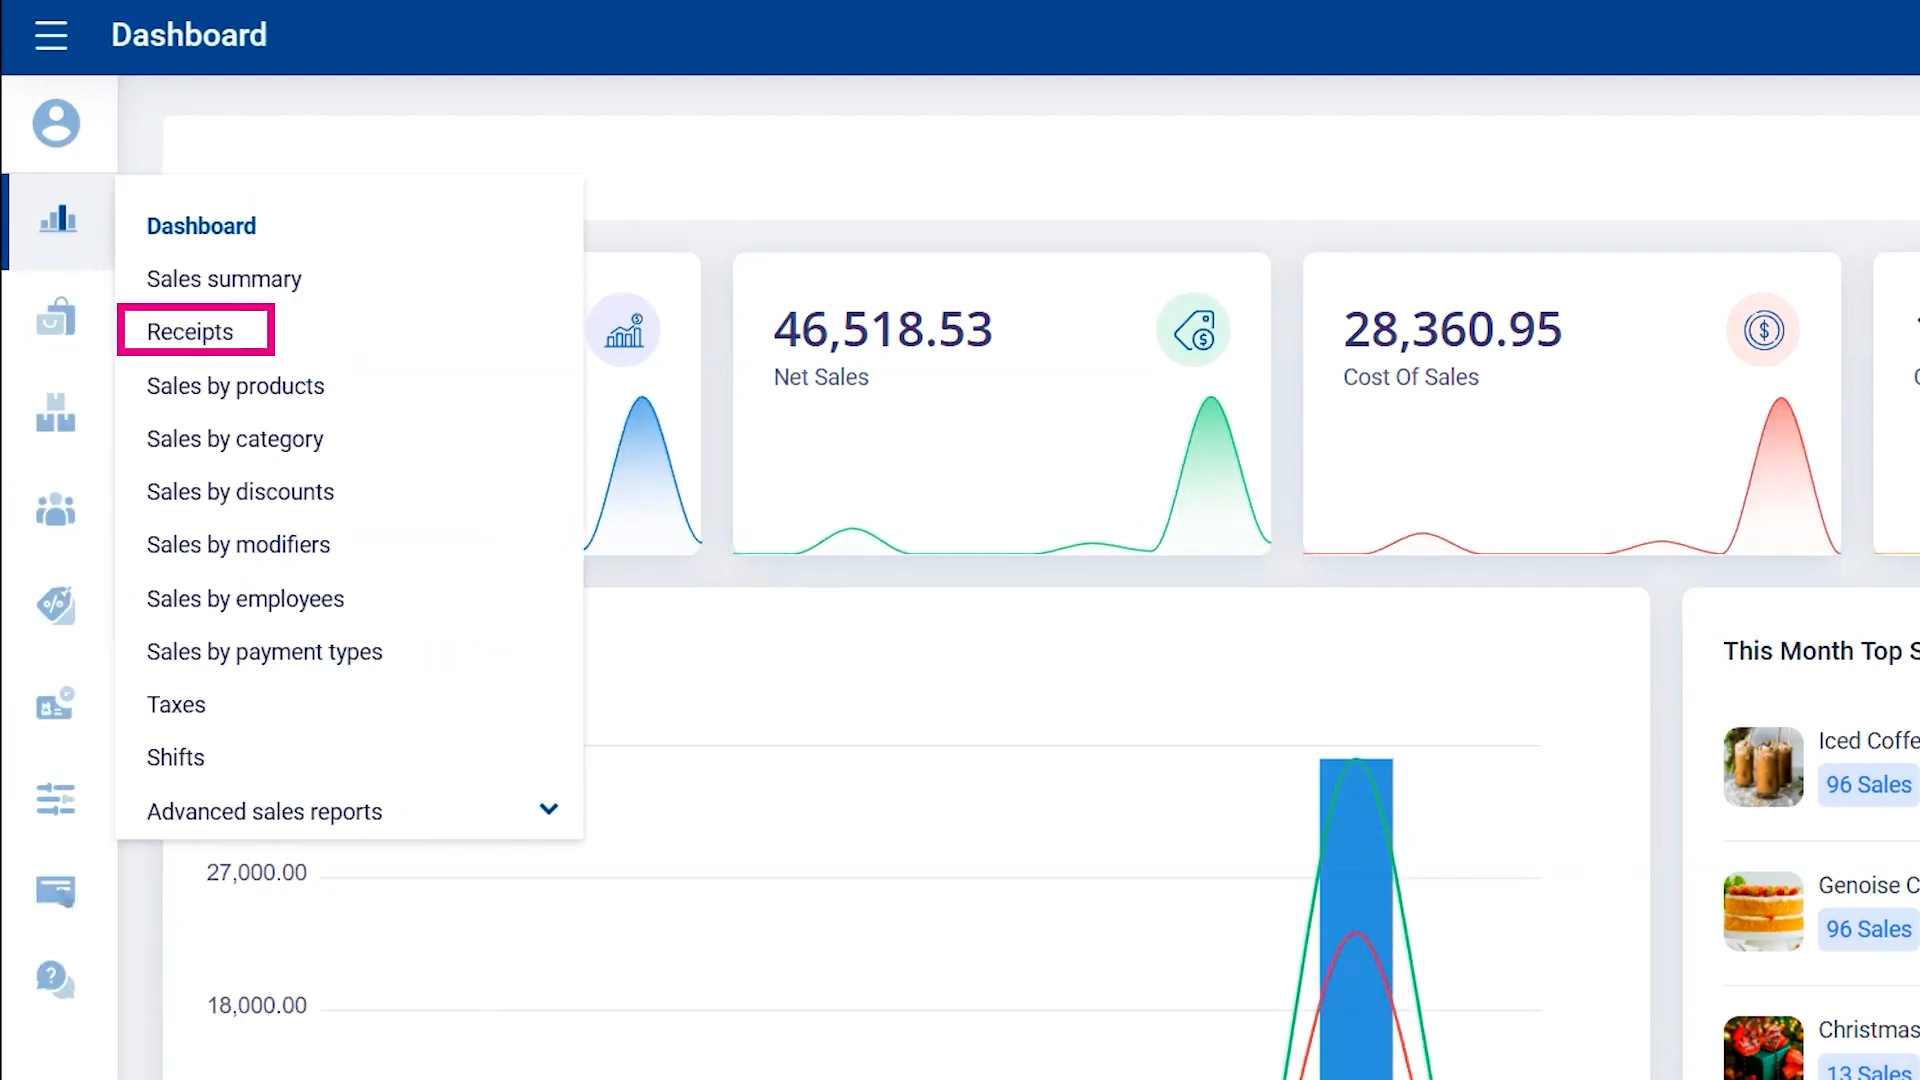
5. To view past receipts, navigate to Easy POS Back Office Main Menu > Dashboard > Receipts.
You can easily view end-of-day receipts and filter them by date, week, month, or a specific date range of your choice.
6. View, print or delete receipts
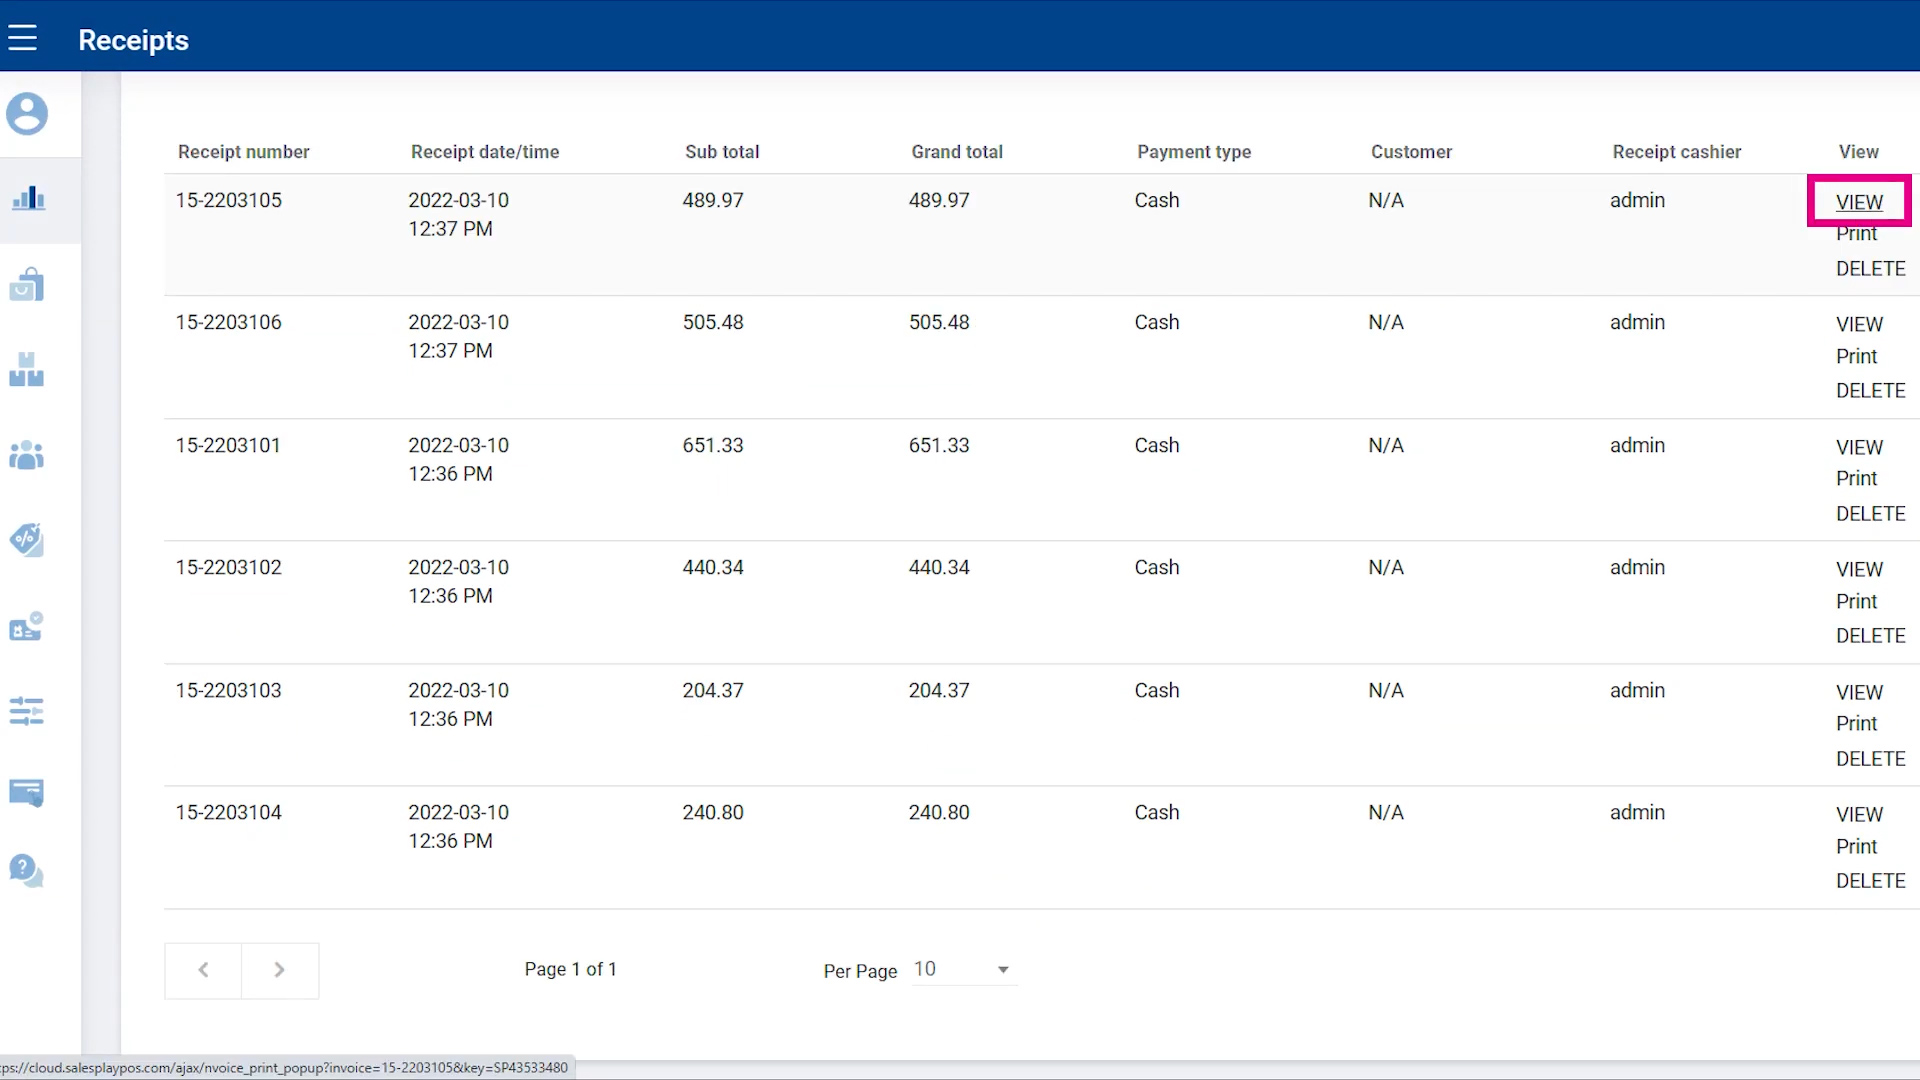
- To view a receipt, click 'View'.
- You can also print or delete receipts, or export and save them as a PDF or CSV file on your device for future reference.
Receipt view

Related articles
How to Create & Use Different Types of Payment Methods
How to Apply Discounts
Sales Summary Report
Related Videos
Was this article helpful? Tell our team what was missing.
Send us feedback