Easy POS

How to Use Xero Accounting Software with Easy POS

▶ Watch the walkthrough on YouTube

Integration of Xero Accounting Software with Easy POS Software

  • Integrating Xero accounting software with POS system offers businesses a comprehensive and streamlined solution for managing their financial operations.

Login to POS Back Office

  1. Select “Settings” from the main menu
  2. Go to the “Feature”
  3. Tick ON “Xero Integration”
  4. Click “Save”

(Once you ON “Xero Integration”, it will appear as a sub-menu in the Settings section)

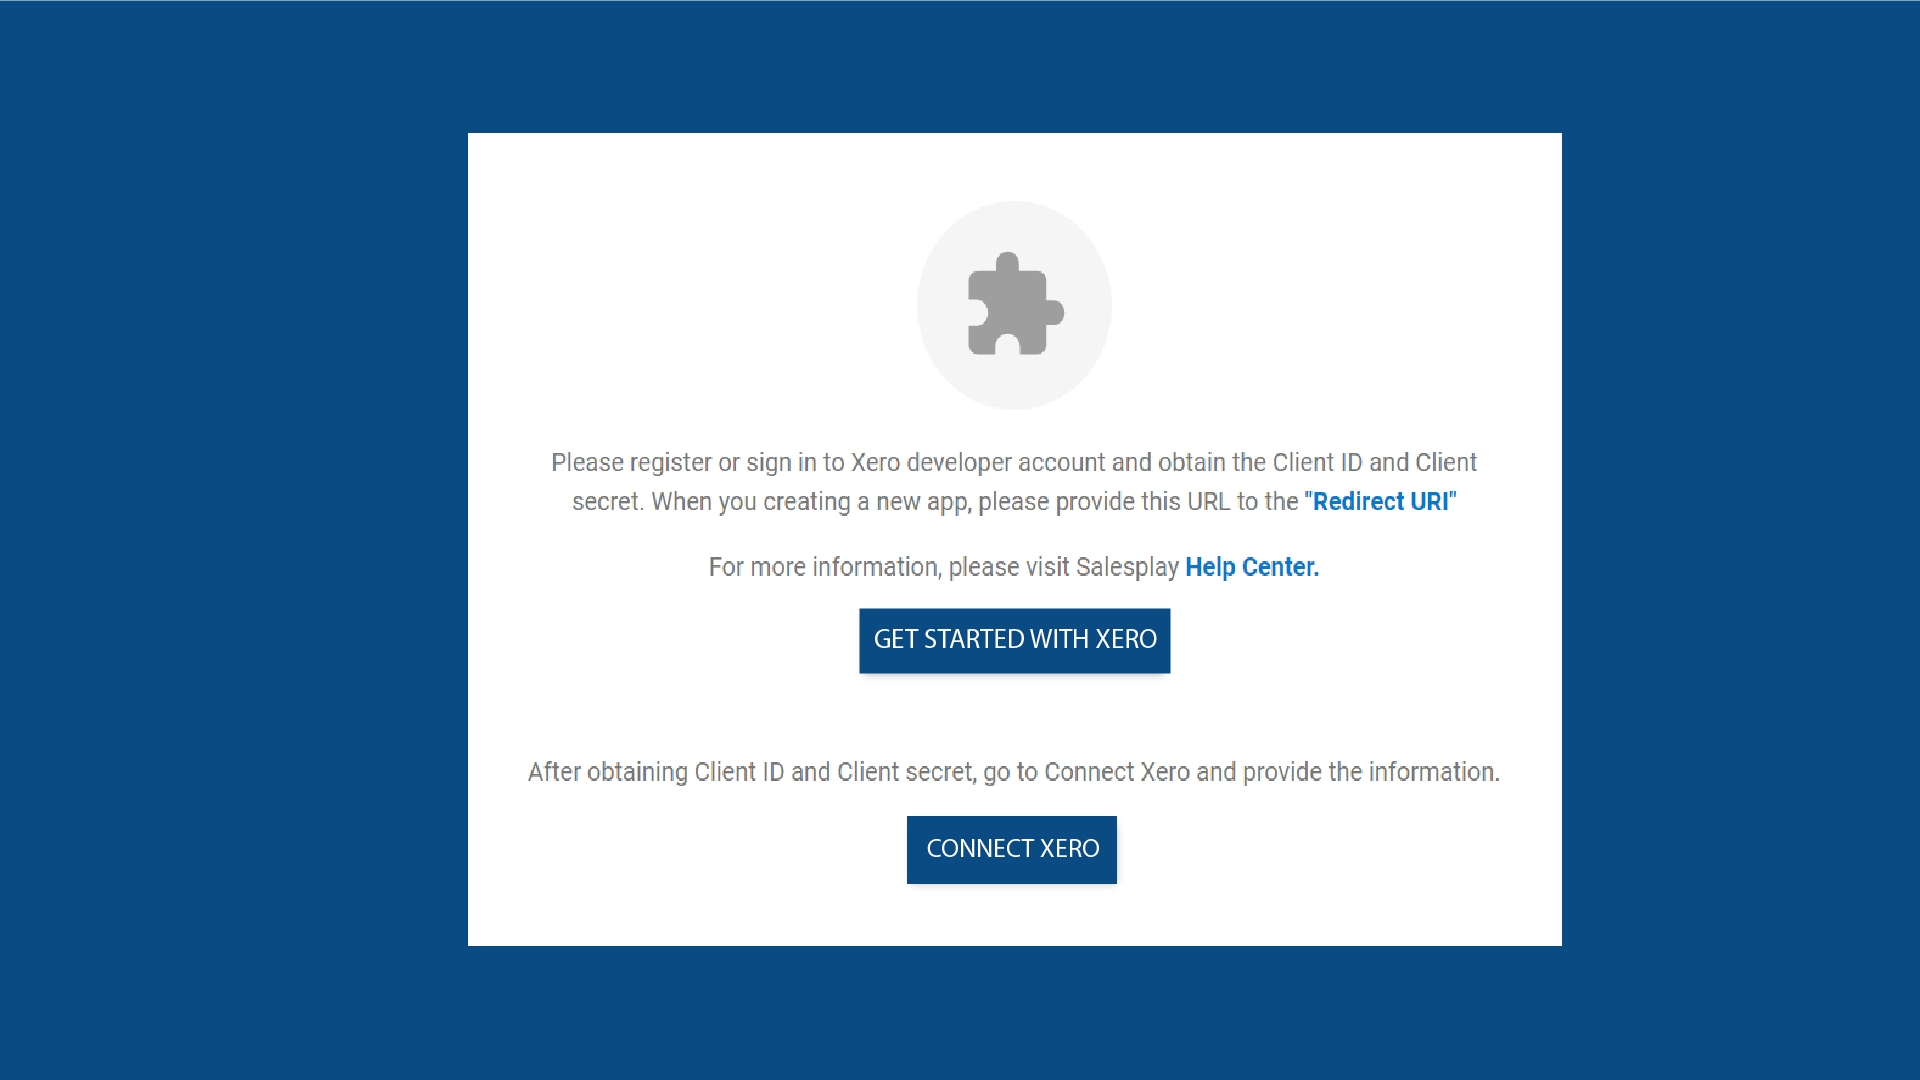
Select XERO from settings and click the “GET STARTED WITH XERO” button

Register or sign in to your Xero account

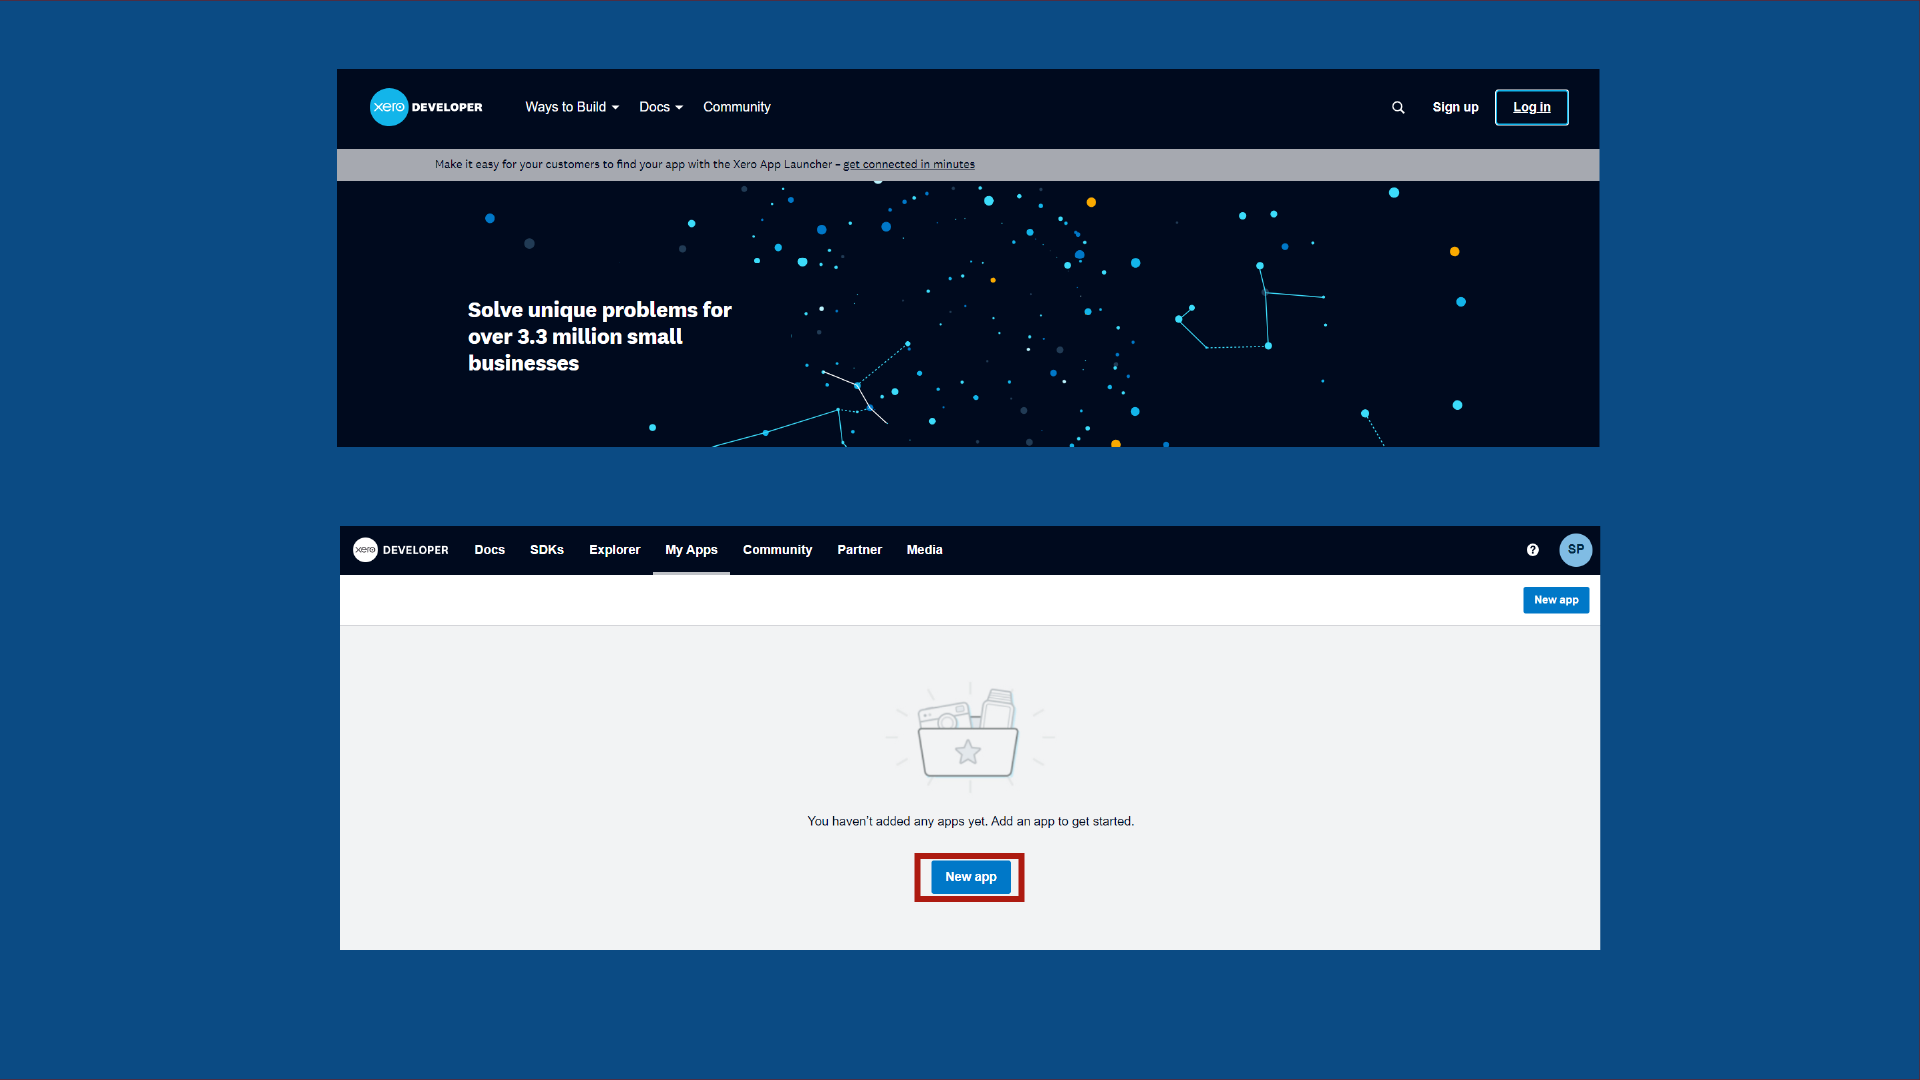
  1. Click https://developer.xero.com/
  2. Click “Login In” and log in to developer.xero account.
  3. Click “New App”

Provide quired details
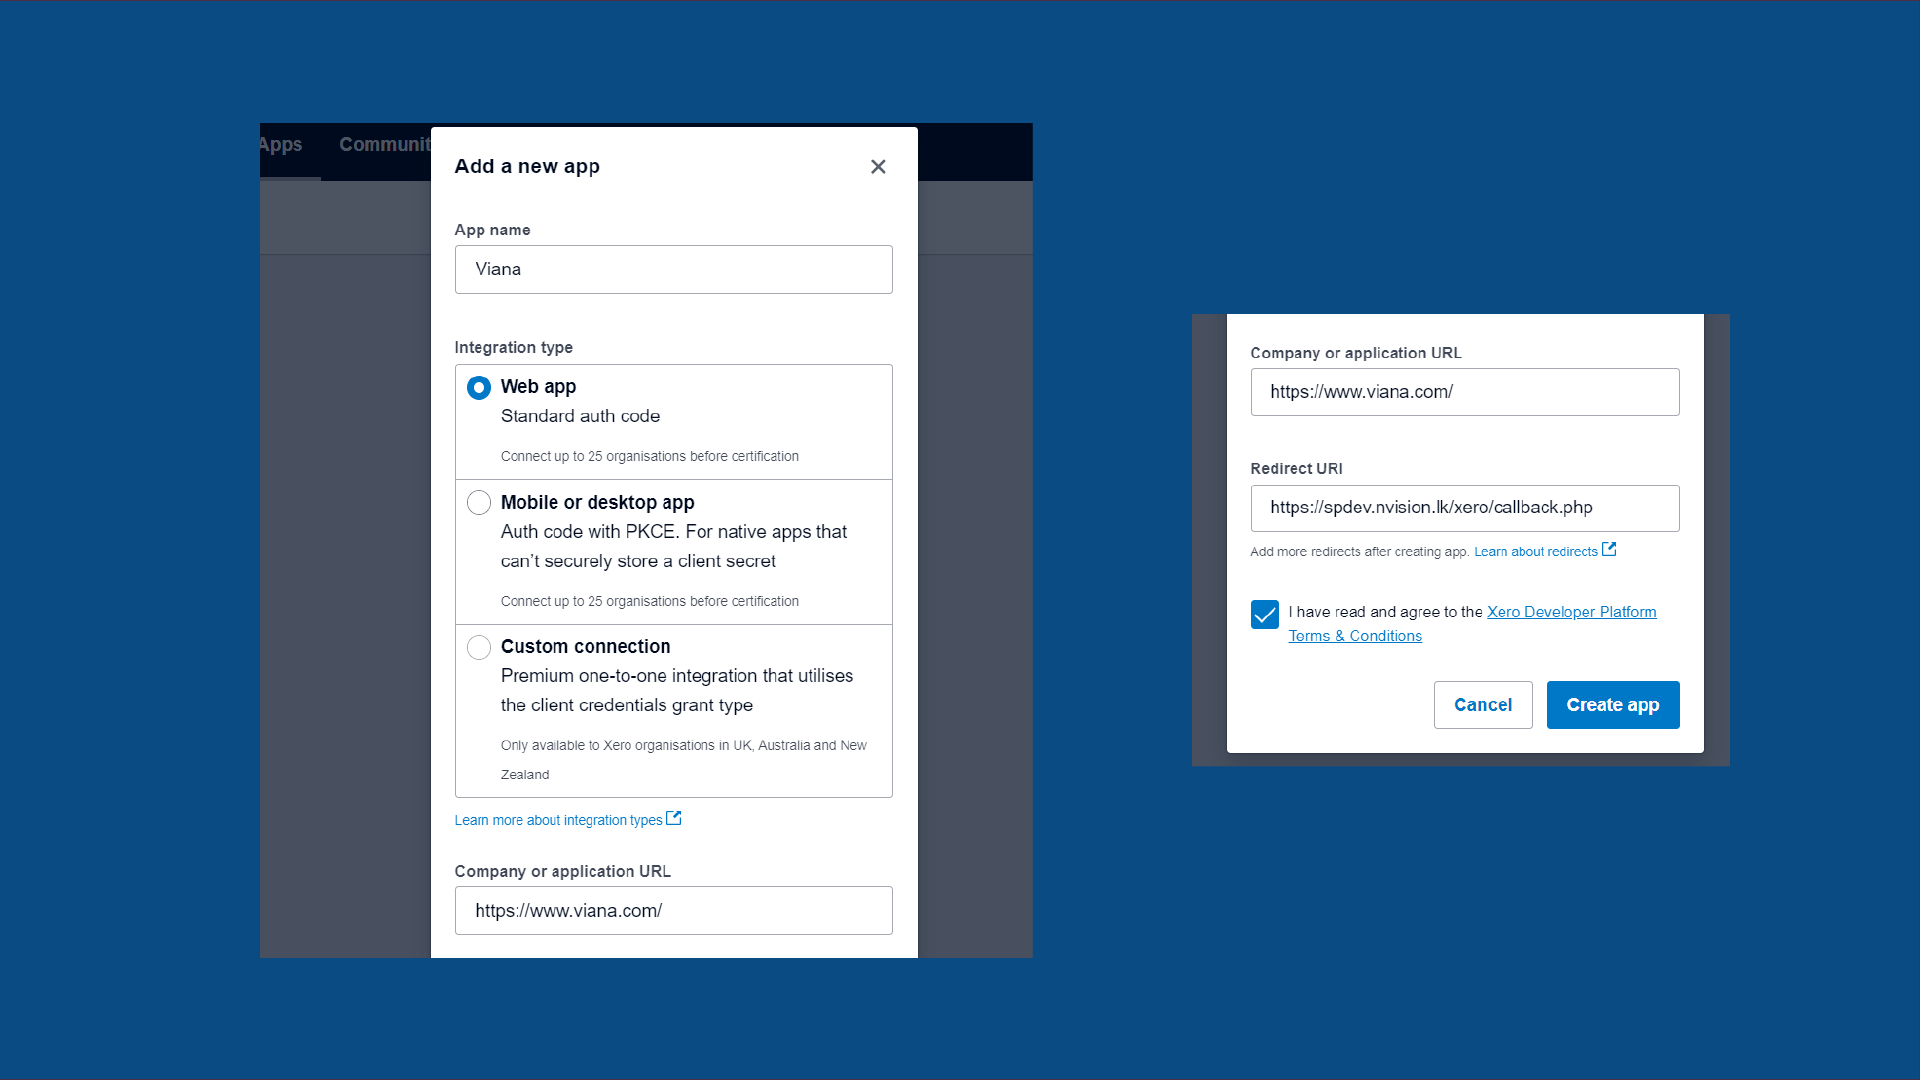
  1. Enter the Shop Name
  2. Select “Web App” as the Integration type
  3. Add company website
  4. Add Redirect URI (This needs to copy from backoffice XERO Section)
  5. Tick on T&C and click “Create App”

Configuration

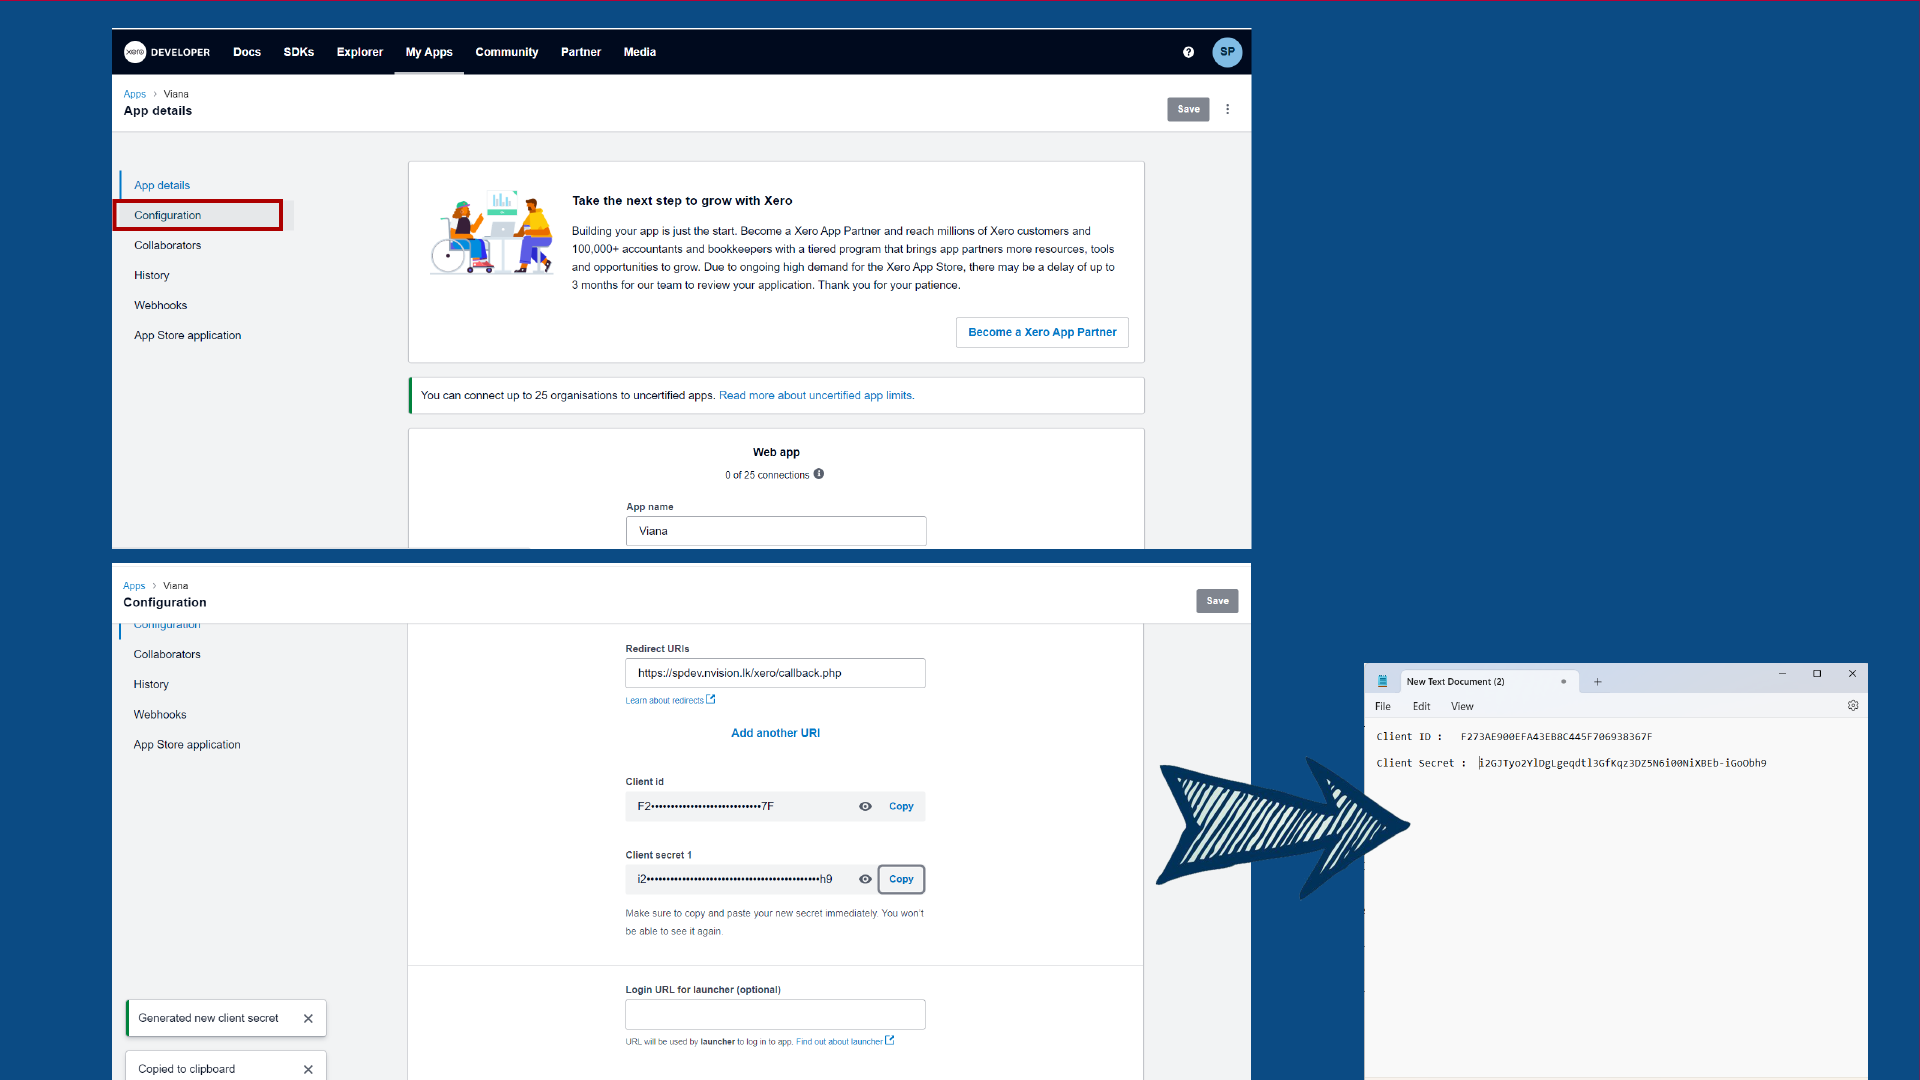
  1. Click the “Configuration” tab in developer.xero
  2. Copy “Client id” and keep it pasted in a separate document
  3. Click “Generate a secret”
  4. Copy the client secret 1 and keep it pasted in a separate document

Click “CONNECT XERO” in Back Office

  1. Enter “Client ID” (You can copy this from the pasted document)
  2. Enter ‘Client Secret” (You can copy this from the pasted document)
  3. Enter the Transaction scheduled time
  4. Keep Is enable “Tick On”
  5. Click “Save”
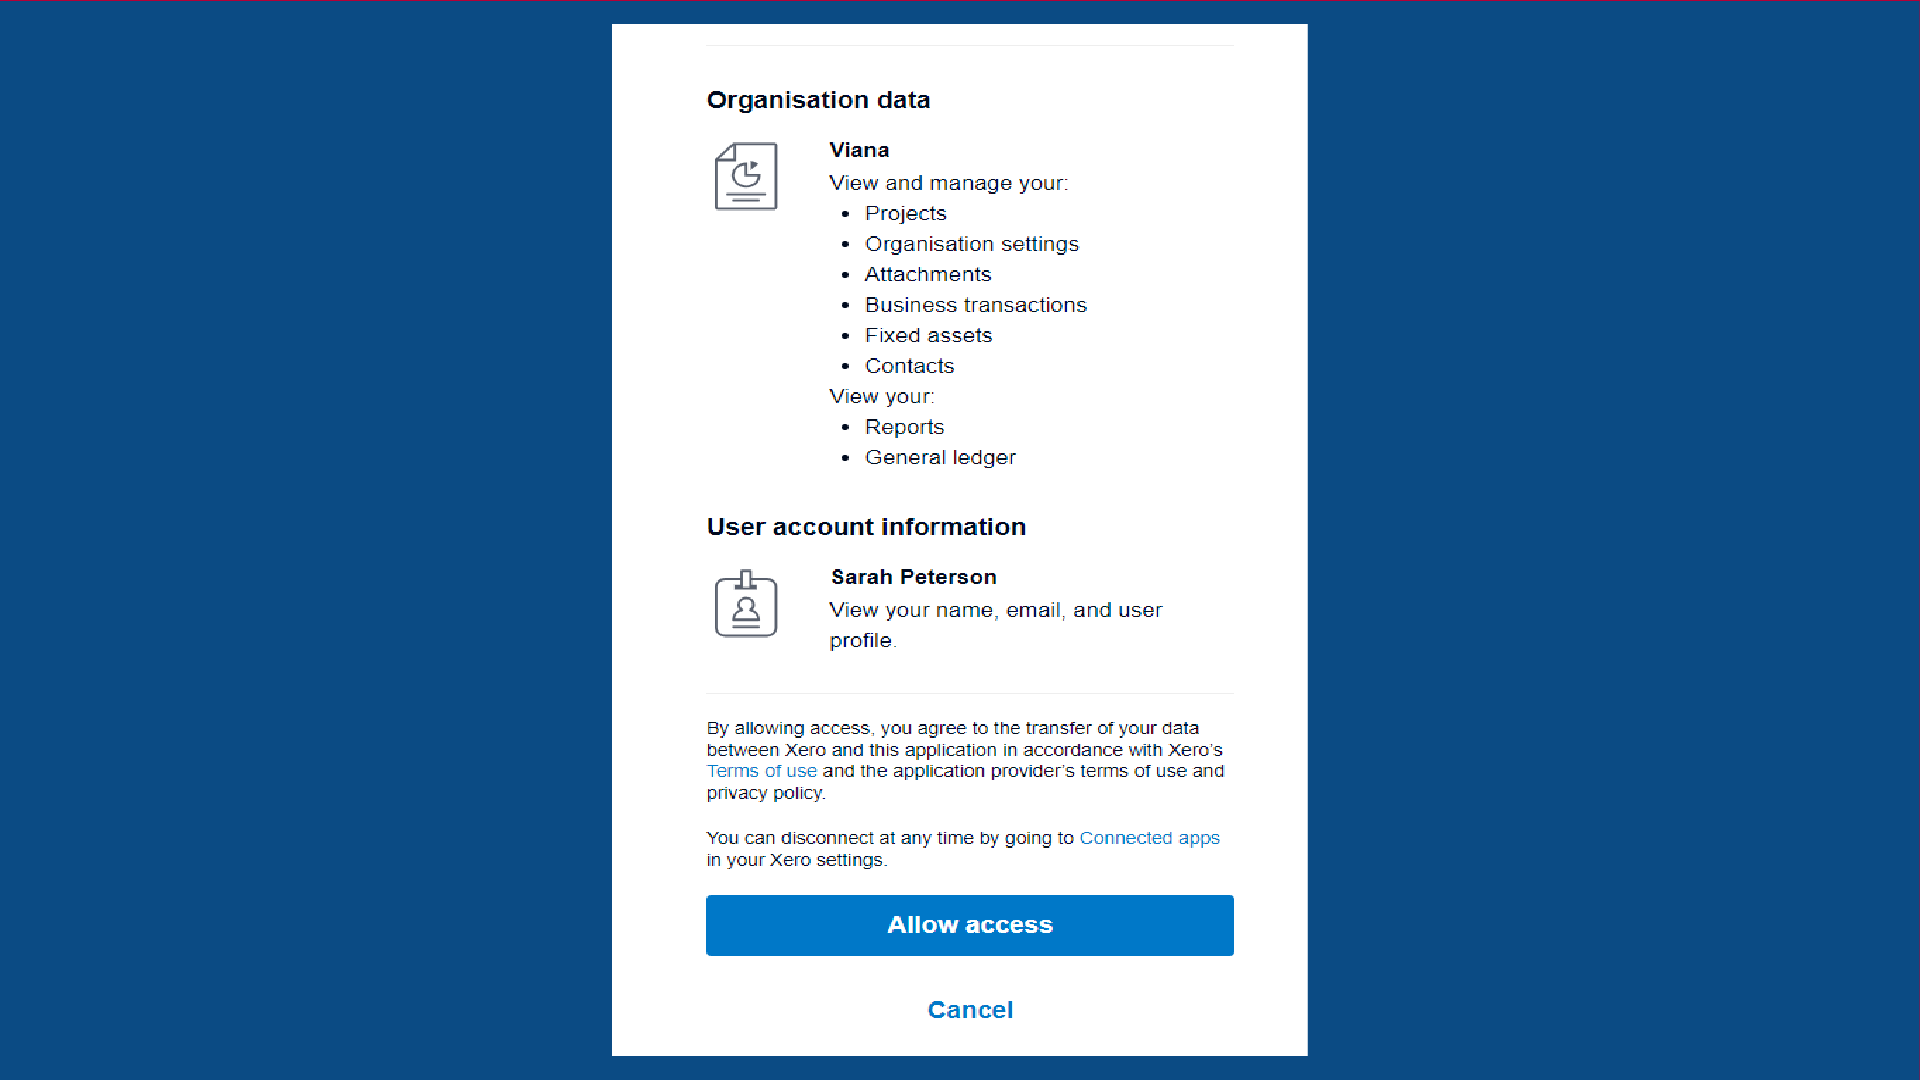
  6. Click ‘Allow Access”

You will receive a message saying “Integration setup completed”

Was this article helpful? Tell our team what was missing.

Send us feedback

Keep reading

Related articles

How to Setup Printers▶ Watch the walkthrough on YouTube Easy POS supports a wide range of printer brands, including popular models like EPSON, ZEBRA, Star Printer, Xprinter, SUNMI, Blue Bamboo, BIXOLON, SCANGLE, and more.Read articleHow to Set Up Cash DrawerPOS App main menu > Select “ Settings ” > Select “Printers” Click the “Add (+) button or edit the existing printer setup > Tick on “ Connect Cash drawer with printer” option > Click the “Save” button Read articleHow to Set Up Styled Receipt HeaderIntroduction The Styled Receipt Header feature in Easy POS App allows users to customize the appearance of specific fields on their receipts. By enabling this feature, key information such as "PaymentRead articleHow to Set Up Styled KOTIntroduction Incorporating the Styled KOT feature into your POS system is a practical step toward improving kitchen operations. The enhanced visibility of critical information ensures that your kitcheRead articleComplete Your Easy POS System Registration by Installing the AppThank you for completing the Easy POS System registration. To fully utilize our platform, please follow the instructions below to install the Easy POS app on your device: 1. Open your device's camera Read articleSetting Up and Changing PINs for EmployeesIn your POS system, you have the flexibility to create different employees with varying permissions and roles to suit your business needs. Additionally, you can set Personal Identification Numbers (PIRead article